Thursday, 19 November 2015

My 5 All Time Favourite Lipsticks

Hello, Everyone :) If you are expecting to see Charlotte Tilbury and Nars here then move along :D I honestly can't get myself to pay £25 pounds on a lipstick I will not even finish....And also I'm a stay at home mother :D sometimes I even find £8 pounds for a lipstick a bit too much.
I'm not a cheapskate by any means, but now that I have a child and no job...I pick my battles, when it comes to shopping for MORE make up. And I just think that drugstore make up is amazing these days. So why pay more when you can pay less...you know what I mean
But here are my super affordable all time favourite lipsticks. Enjoy

1. I think I have spoken about this for years....it feels like it at least. It's the Bourjois Rouge Edition Lipstick in the shade Violin Strass 18
I wear it at summer, I wear it at winter, in the morning and evening...you get the deal. The formula of this lipstick is so buttery, the colour is so pigmented and it stays on for a really long time....unless you have a messy buger...but girl, you can't have it all now can you? You should, but you can't. I just like that it's not too dark and it's not too pink...even though it does look a bit pinkish on the picture.
I could just go and have the rest of the 4 favourites of this same lipstick in different shades...but I'm not going to. Because that wouldn't be fair to the other brands, which are almost equally as awsome.
What I will say though is that I will do a brand review on the Bourjois brand, so I will give you little reviews and swatches of their shadows and powders etc, so stay tuned for that one :)

2. MOVING ON. Second favourite, I never thought I would say this about a L'oreal lipstick, because I have hated every single one I've owned, still own...I'm a horder...can't throw make up away. But my second favourite lipstick is the L'oreal Paris Color Riche 134 Rose Royale. It still SMELLS like all the L'oreal lipsticks...like dusty rose/old grandma/mould lipstick, but I don't care, because it's so pretty :) It's a really nice bright pink colour. And I find it really goes with my new lighter hair colour as well. It's really creamy and it stays on well.


3. The cheap one. Make Up Revolution (this is a brand that has just recently launched in US as well, so it is available in drugstores there) £1 lipstick is really something you don't think is going to work or do anything a lipstick should, but it's amazing. The colour I love is called Bliss and it's a matte peachy colour. Love it, use it all the time and I think orange colours work really well with all skin colours and all hair colours so all in all it's a sure thing winner.

4. Manhattan ''Colour Care'' Soft Rouge Lipstick in 410 Soft Coral. Manhattan is a brand that is owned by the same company as Rimmel. And I know Manhattan is not sold in UK ( I got mine in Estonia) but there will be a dupe/same products...different packaging for this product in the Rimmel section..I have't found it. Ok, ok, guys, I haven't even looked :D But it does also remind me of Revlon Butter lipsticks, so you know. There are similiar products out there :) But this is my go to cold weather lippy. It's just nice and buttery and soft and nourishing? It's very good, you guys, very good :)


5. Ok, confession time. This is not a lipstick :D It's a lipgloss, but I just felt it needs to be mentioned over here. It's my go to everyday nude lipgloss that I can't get enough of. It's the E.l.f mineral lipgloss in nude :D And I do wear it pretty much every day at home or running errands. It's not the kind of dusty frosty nude, but rather a noughaty nude :) so it's more brown than beige and that's how I like my nudes ;);) ... never mind :D


Hope you enjoyed the thorough lipstick post today :) 
Stay tuned
xoxo
Meril

Friday, 13 November 2015

Home-Made Take-Away

Good Afternoon, Everyone :)
Today I will be sharing a dinner recipe that we love and have weekly. Home-made bunless burgers with sweet potato fries, corn on the cob and guacamole.
As a family we don't get a lot of take-away food. Reasons are, that you can never be too sure about the quality of the food and it's really a hit or miss with taste sometimes. Another reason is that I really enjoy cooking and some might say I'm a feeder :D It's my way of showing I care. I cook a nice dinner and I love trying out new recipes, using amazing produce and making tasty meals for myself, D and Oscar. Don't get me wrong we do like a nice pizza every now and then when it's either been a long day or a week. We also order Indian food every now and then because D likes a curry and I can't really make one....to be honest I hadn't even tasted a curry before I met him :D
But here it is. One of our family favourites...BURGER AND FRIES :) and I have to mention that I forgot to put the corn in the oven....CORN IS MISSING :D

What you need :
BURGER
 - good quality mince meat 250 grams is enough for 2 people (2 and a half in our case)
 - 1 red onion
 - 1 clove of garlic
 - 1 egg
 - 1 gherkin (This is optional :D)
 - Seasoning ( I use garlic pepper, salt, basil, and also generic italian seasoning)
 - cheese ( I like to grate the cheese and then top the burgers at the last minute. I then put a lid on the pan for a minute or so to let the cheese melt) You can also mix the cheese into the burger before cooking.
With the burgers you just mix all the ingredients together and add the egg last. The egg will bind the whole mixture together. Make two (2 big 1 tiny for our family :D I made 3 medium size this time) patties and leave them on the side until you prepare all the rest of the ingredients

SWEET POTATO FRIES
 - 2 sweet potatoes ( but this depends on the size)
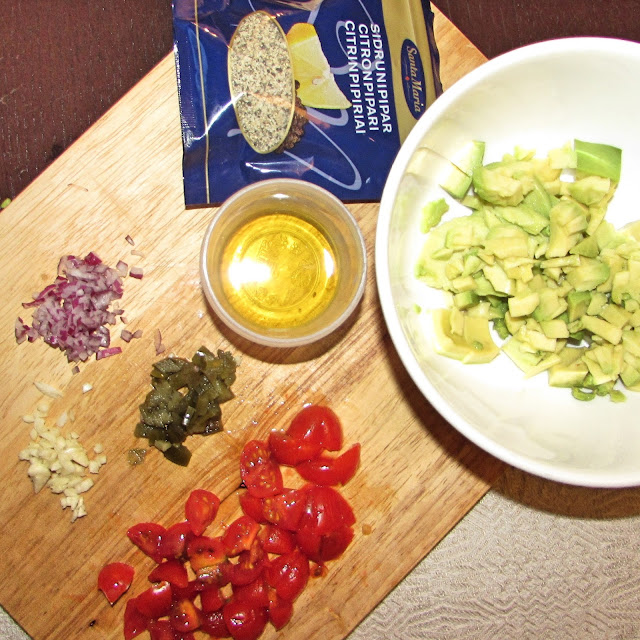
 - seasoning ( I use a ready made potato seasoning by Santa Maria, in UK you can find it pretty much every Lithuanian, Polish, international store) But paprika, salt, pepper, garlic powder and salt powder will do just as well
 - oil
I have a trick here. I use a big zip lock bag, add dry sweet potato fries...I dry them with a paper towel, then I add the seasoning shake it up and the oil Zip the bag up again and give it a last good shake. I cook the fries in a 180'C over for about 15-20 minutes or until they are crispy. You don't want to put too many on a tray because if the tray is overloaded the potato ends up steaming rather than crisping up. And I use greaseproof paper rather than foil, as I find that foil makes the fries stick more.
GUACAMOLE
 - 1 ripe avocado. (here's a tip. If you can squeeze the stone out of the avocado it's perfect for guacamole)
 - finely chopped onion slice
 - 1 clove of garlic ( I like to use a garlic press, because I think it makes the taste more intense)
 - finely sliced jalapeno pepper (just for that extra kick) you can also use chilli powder or chilli flakes or leave this part out all together.
 - oil
 - salt
 - pepper
- squeese of lime ( I usually don't have lime so I add lemon pepper instead )
 - finely chopped tomato
( Oscar doesn't have this, which is why I can add the jalapeno. He doesn't like the texture of avocado on its own, so he has cucumber slices instead)

CORN ON THE COB
This is pretty straight forward :D we use big frozen packs of vegetables and the same with corn. SO I just put the frozen corn in the oven with the fries and add a knob of butter after cooking. ( like I said earlier I forgot the corn )

And there you go...An amazing dinner, that everyone will enjoy. And you can make it high carb by adding that burger bun if you really feel like treating yourself :D

Hope you enjoyed the post
Do you have a dinnertime favourite?
Do let me know once you've tried out the recipe yourself and
as always, Stay tuned
xoxo
Meril

Wednesday, 11 November 2015

Recipe: Vegan Chocolate-Peanut Butter Cups


This weeks recipe comes to you from my lovely friend Jo who is passionate about making vegan food delicious :) Keep reading for a mouth watering peanut butter recipe that you can try out yourself. 


Chocolate-peanut butter cups ( no baking required!)

This lovely vegan dessert recipe is based on Reese's peanut butter cups


For the Peanut Butter Base: (Makes 6 big cups)


3/4 cups of roasted or raw almonds or almond pâté.
3/4 cups of medjool fresh dates
1/3 cup of dry oats
1/2 cup of all-natural peanut butter (or almond butter). 


Throw all the ingredients into a food processor or blender & pulse until everything is mixed together into a crumbly paste. Press the mixture down into your mini-size cupcake moulds...then place the tray in the freezer & allow them to set until firm


For the Dark Chocolate:


150g of dark vegan chocolate
Vanilla extract

Melt chocolate in hot water bath.
Add a little bit of vanilla extract and pour melted chocolate over the cupcake base. Leave in the fridge overnight or until chocolate is set and enjoy :)


JO Dampf

It's all about happiness, love, vegan food, health, fashion and style! I am in charge how I feel today and today I'm choosing happiness !


Stay tuned for more vegan recipes from Jo during this month, every Wednesday :) And you can also follow her on her Instagram  account for fashion inspiration and vegan food heaven :)

Tuesday, 10 November 2015

Easy DIY Christmas Centerpiece

Good Evening, Everyone :)
Tonight I am sharing an easy and affordable Christmas/Festive centrepiece you can make with things you probably already have or can get very easily. Hope you enjoy and give it a go.

Things you need

1. Some pinecones ( I got mine from Homebargains, they were in a massive bag called poupurri (I beg to differ) :D they don't have any scent to them but they were £2.99 and I got them for the reason of using them as decorations anyway rather than use the pack as poupurri. You can definitely just go and pick them yourself...unfortunately I couldn't find any pine trees....ANYWHERE...
2. Small baubles ( the ones I used are from John Lewis and they were £5.99 if I remember correctly...I probably don't as I bought them over a month ago)
3. flat ornaments. I picked out these silver star tree decorations from Homebase and they were £2.99 for a pack of 20 (maybe they were £3.99)

4. A big dinner plate
5.A candle ( This amazing candle is from TkMaxx and it was only £7.99 :O You don't get much better than that I think) 
You can also use a simple white (or whatever colour you like) because the garland/centrepiece itself is already quite festive.

Honestly I'm not too good at remembering prices as I've just realised. But it's because none of these things were expensive. I'm sure I would remember paying £20 for Christmas tree decorations :D

And then what you do is just place the candle in the middle of the plate and arrange all the decorations around it :) It's so simple and it's just beautiful. I do like long centrepieces, but I also like having food on the table during Christmas dinner, so I think something beautiful just at the centre of the table does the trick. 


Hope you enjoyed this little Christmas post....I know it might be too early for some. But if you have a child or children or dog or donkeys you just find that planning your time and doing things ahead of time saves you a lot of stress later :)
Let me know what you think and if you're going to try some diy Christmas decorations yourself :)
And as always stay tuned. Tomorrow I will share another vegan recipe by Jo :)
xoxo
Meril

Sunday, 8 November 2015

Estonian Biscuit Cheesecake

Good Morning, Everyone. I am very excited to share an amazing cookie cake recipe by my lovely friend Kadi :) Making no bake biscuit cakes is kind of a big deal in Estonia :D Everyone knows what you mean the minute you mention it so now you too can be in the know.
I have to mention...again....how excited I get whenever someone mentions the biscuit cheesecake so I am so happy that I get to share this one with all of you :) And here it is :)

As a city dweller I command a fairly small kitchen, meaning the use of an oven usually entails me yanking it out of the cupboard, setting it on my kitchen table and loosing that all-important working space. In addition, baking is a more time-consuming endeavour, which is why after a long day during the week I turn to a simple yet effective recipe: a delicious Estonian biscuit cheesecake (also a great Fathers’ Day present, which we celebrate here today).

The recipe is suitable for bakers of all ages!

All-important ingredients (all depend on the size of the cake you make): 

1.       Sour Cream
2.       Cheese curd (quark)
3.       Cocoa powder
4.       Biscuits
5.       Berries
6.       Juice

1. Decide on the size of the cake you want to make and choose a suitable cake base, preferably with higher edges, as the masterpiece will tower =)

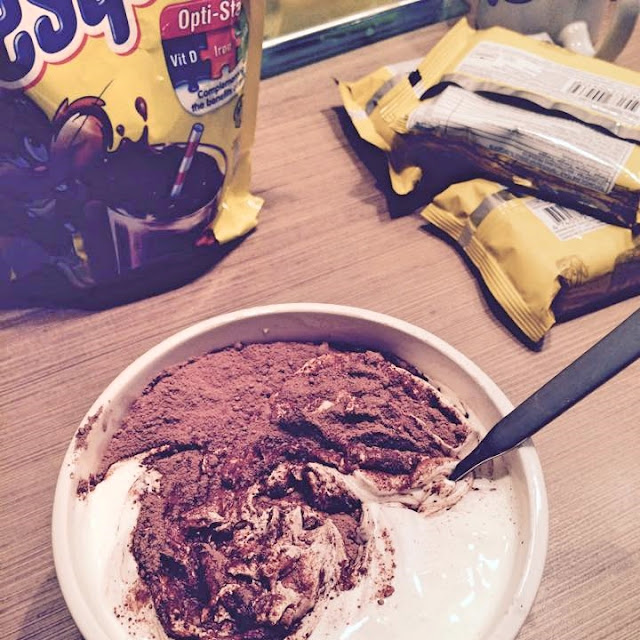
2. Mix the cocoa powder (preferably sweetened) with the sour cream (for the size of the cake I made I used about 750g of sour cream; add the cocoa to taste)
3. Use the mixture to cover the base of your cake base. Be as generous as You want.
4. Mix together the cheese curd + cocoa sour        cream mixture and add berries of your choice – blackcurrants are a personal favourite of mine. (you can use different berries on different layers, like bananas and strawberries ...anything really)
5. Once the mixture is done and the cake base ready you can start building the cake. Before layering the biscuits I like to soak them in some orange juice. This allows the biscuit to more easily absorb all the flavours of the cake and makes the consistency more pleasurable.

6. Cover the biscuits with your mixture of cheese cur, sour cream, cocoa and berries and then add another layer of biscuits – I have chosen to use different flavour of biscuits for varying layers.
Keep going till You’ve reached the desired height.

7. Once You’ve finished, cover the entire cake with the sour cream cocoa mixture You used on the base and cover the cake in its entirety. Design Your own topping and decorate as you please. 

Cover the cake and let is set in the fridge for overnight. However if You’ve used plenty of cream and soaked your biscuits You can dig in after a few hours!

There will be more posts from Kadi during the coming months (hopefully :D) In the meantime you can follow Us and Kadi on Instagram. You can also follow the blog on Bloglovin or you can just keep checking back :)
As always hope you enjoyed the post by the wonderful Kadi 
AND 
Stay tuned
xoxo


Thursday, 5 November 2015

Amazing Homeware On A Budget

If you are one of those people, who loves a good bargain, but hates sales, then keep reading :) I am definitely one of them. I hate sale shopping in the shops (not so much on-line)...so when I find a brand that has affordable prices all year around I get really excited.
As you might have guessed by the title of this post, I am talking about home things here. I just can't get myself to pay 60 pounds for a bedset when I can get one that looks pretty much exactly the same for half the price. And what I have found is that department store own brands are THE BEST at offering awseome  homeware for awesome prices. So here are a few of my favourite pieces I have found over the past month....there are some Christmas related things...I just can't help myself :D
I have two favourites. Asda and Tesco...and I started out this post thinking I will just do one of these, but then I got really into it and I think there is sooooo many gems to share...I will do them in volumes :)

I will start with Asda as I actually live quite close to one now and have managed to get a few things to try out the quality as well.
Here are the few things I have picked out to share with you all.

1.
Bronze ceramic bowl - £3.50
Black Candelabra - £12
Pomegranate and pink pepper reed diffuser - £5
O votive Candle - £2

2.
Mark Making Cushion - £8
Gold dipped hurricane vase - £5
Potpurri Christmas Tree - £5
Merry Christmoose cushion - £7

3.

Mercury Effect Elephant glass lamp  - £20
Metal Terrarium - £10
Chalkboard Globe  - £15
Bark tealight holder - £3 (I have a bigger size that fits a medium pillar candle, and it was £5)

4.

Shine Like The Stars Cushion - £7
Copper Trinket box - £10
Copper Pillar Candle holder - £7
Rose gold Mirror - £5

5.
Bell Jar with Scroll  - £12
Jones Darwin Clock - £15
Glass Topped Marble Effect Box - £12


I don't think I have to mention it anymore of how amazing these things are. And they are so affordable. I haven't linked all of them because they are super easy to search on the asda webpage ..so go browse, I will assure you, that you will find something amazing to turn your house into home

Similar (or exact) products I've found at a great price :)

Hope you enjoyed the post.
Let me know which place is your favourite for home things :)
And as always, Stay tuned :)
xoxo
Meril

Wednesday, 4 November 2015

Recipe: European Vegan Cutlets


This weeks recipe comes to you from my lovely friend Jo who is passionate about making vegan food delicious :) Keep reading for a kick ass vegan cutlet recipe that you can try out yourself. 

This recipe is so easy to make. The European veggie cutlets need a bit of time and effort , but in the end the delicious meal is worth every minute you've spent.

What you need for the cutlets

  • one can of red kidney beans
  • two medium sized onions 
  • wild mushrooms , 
  • one small zucchini, add 
  • 2tbsp of wholegrain flour and 
  • a little bit of water , add 
  • 2tsp of curry powder, 
  • fresh chopped parsley, 
  • 1tsp of olive oil, 
  • salt and pepper
  • breadcrumb and flour mix to roll the cutlets in before frying

Pour the water away from the kidney beans and mush them all up in a medium sized bowl. Chop up two medium sized onions (yellow or red), some wild mushrooms and one small zucchini. Add two teaspoons of wholegrain flour (this is a taste preference, you can use white flour just as well) and a little bit of water. To season add 2 teaspoons of curry powder some chopped parsley, oil and salt and pepper.

Mix all ingredients together until the mix has a nice doughy consistency.Then shape the small dough balls and roll it in the breadcrumb and flour mix. If they start falling apart add a little bit of more flour or kidney beans
...then I added a little bit of extra oil in the pot and when the oil is hot enough add the cutlets Heat some oil in a pan and start frying. I recommend to fry 4 cutlets in a same time cause otherwise they are going to fall apart as you need to turn them around . You definitely need to fry them on both sides as they are a little bit on the thicker side. Fry them until they look golden brown . And ready they are.

You can do the white sauce now . 


What you need for the white sauce

  • 1 Cup of soy milk
  • 3 tbsp of flour
  • some chopped up parsley and dill
  • salt and pepper
Heat the soy milk until boiling point and add 3 tbsp of flour, stir it until it looks smooth, chop a little bit of fresh parsley and dill in it , add salt and pepper. continue boiling for about 5 to 10 minutes and it's done! 

You can also serve the food with rice, wholegrain spaghetti or ricenoodles but I boiled potatoes and chopped them to little pieces and fried it on the pan until it looks golden and mushy . Also , what's a meal without a juicy salad? I chopped tomatoes, cucumbers, pickles and lettuce , add a bit of freshly squeezed lemon juice in it and seasoned with salt for my simple side salad. 

Hope you enjoy your Mushroom-zucchini cutlets ! Completely VEGAN, but you wouldn't know unless you heard it here ;)


JO Dampf

It's all about happiness, love, vegan food, health, fashion and style! I am in charge how I feel today and today I'm choosing happiness !


Stay tuned for more vegan recipes from Jo during this month, every Wednesday :) And you can also follow her on her Instagram  account for fashion inspiration and vegan food heaven :)

Tuesday, 3 November 2015

10 Inexpensive Night In Ideas


   1. Hot Chocolate and ''Autumn In New York'' This is my ultimate Richard Gere movie (after ''Pretty Lady'' of course) I do think it's quite girly though, so maybe pick a night where your partner is away for a guys poker night...also you might cry, which can get embarrassing :D

   2. DIY - It's not for everyone :D But hey give it a try. You know you've always wanted to try out those galaxy nails you saw on Pinterest :D

   3. Read a book...when was actually the last time you read one.

   4. Cook with the other half ( if you're single invite a friend over) chop, fry, mix and knead :) just make sure you do it together and later you can enjoy a delicious meal ( unless you're a really bad cook...then this might turn into a ''cook with your partner and then order a pizza'' kind of night )

   5. Bake - Make some cupcakes, home made chocolate chip cookies, apple and cinnamon crumble...just bake. The house will be filled with delicious smells and there is nothing better than a warm crumble on a cold autumn night

   6. Order pizza and watch ''Friends'' with friends. Or meet up with your girlfriends, make loads of Manhattan cocktails and watch ''Sex and the City'' Share the cost by telling everyone what to bring :)

   7. Make chocolate truffles. They are so easy to make and you can decorate the with all kinds of different things. Later you can box them up and use them as sweet presents :) If you're not really into chocolate ( You weirdo) then roast some honey covered nuts, pour them in a cone and go for an evening stroll in the beautiful Autumn night. Or just spend your time with making the most perfect cup of hot chocolate


   8. Organise - if you have been planning to do the final clean before Christmas then it's best to divide your duties. One day clean the windows and do the annoying bits and bobs that need doing. But rainy Autumn evenings are best for sorting out the drawers and cupboards. Pack up the summer things and get ready for Christmas time. Organise your pantry to make that massive cooking day on the 24th/25th enjoyable. Re-arrange all your make up, your socks and your sweaters :)  

   9. Write your Christmas cards. You know you're going to forget. Take your time and use those golden/silver pens you've had since last Christmas and write beautiful poems in cards for your friends. They will appreciate the effort and wonder where ever did you have time for that :D    


10. Start a new tradition - It may be a yearly thing or just a temporary weekly thing. Watch a series of movies (Harry Potter, Twilight, The Hunger Games) I like to pick the ones that have all the movies out already. Because you don't want to wait a year for the next one to come out...

Hope you found some fun activities for your nights in this Autumn :) Stay tuned for next weeks post, where I will share 10 new traditions to start this year :)
xoxo
Meril


Monday, 2 November 2015

The Faux Fur Edit

We have all been there...The winter comes and we feel like we need a whole new wardrobe. New colours come in every year and new styles and everything seems to be new. But there is a way to make your old wardrobe work this year around and the next ones coming. All you need is these two items in your wardrobe... 1. The faux fur gillet and 2. The faux fur collar
The items are so versatile and make any outfit feel warm, stylish and seasonal.


There are many ways on how to corporate the faux fur into your autumn/winter wardrobe. You can use you summer dress under the gillet/vest and wear it with boots and a cardigan. You can use the vest over your last years comfortable high neck jumper and add some killer over the knee boots. You can use the faux fur collar over your leather jacket or a nice cardigan...you get the deal.
So if you are thinking of which accessory to add to your wardrobe this year. Make it faux fur. It doesn't have to be expensive and you can find pretty much every colour to choose from as the vareity
is so amazing this year.
Check out a few of my favourites above...and look out for an outfit post in the coming weeks using exactly the two pieces just mentioned.

And as always
Stay tuned
xoxo
Meril