Tuesday, 10 November 2015

Easy DIY Christmas Centerpiece

Good Evening, Everyone :)
Tonight I am sharing an easy and affordable Christmas/Festive centrepiece you can make with things you probably already have or can get very easily. Hope you enjoy and give it a go.

Things you need

1. Some pinecones ( I got mine from Homebargains, they were in a massive bag called poupurri (I beg to differ) :D they don't have any scent to them but they were £2.99 and I got them for the reason of using them as decorations anyway rather than use the pack as poupurri. You can definitely just go and pick them yourself...unfortunately I couldn't find any pine trees....ANYWHERE...
2. Small baubles ( the ones I used are from John Lewis and they were £5.99 if I remember correctly...I probably don't as I bought them over a month ago)
3. flat ornaments. I picked out these silver star tree decorations from Homebase and they were £2.99 for a pack of 20 (maybe they were £3.99)

4. A big dinner plate
5.A candle ( This amazing candle is from TkMaxx and it was only £7.99 :O You don't get much better than that I think) 
You can also use a simple white (or whatever colour you like) because the garland/centrepiece itself is already quite festive.

Honestly I'm not too good at remembering prices as I've just realised. But it's because none of these things were expensive. I'm sure I would remember paying £20 for Christmas tree decorations :D

And then what you do is just place the candle in the middle of the plate and arrange all the decorations around it :) It's so simple and it's just beautiful. I do like long centrepieces, but I also like having food on the table during Christmas dinner, so I think something beautiful just at the centre of the table does the trick. 


Hope you enjoyed this little Christmas post....I know it might be too early for some. But if you have a child or children or dog or donkeys you just find that planning your time and doing things ahead of time saves you a lot of stress later :)
Let me know what you think and if you're going to try some diy Christmas decorations yourself :)
And as always stay tuned. Tomorrow I will share another vegan recipe by Jo :)
xoxo
Meril

Sunday, 8 November 2015

Estonian Biscuit Cheesecake

Good Morning, Everyone. I am very excited to share an amazing cookie cake recipe by my lovely friend Kadi :) Making no bake biscuit cakes is kind of a big deal in Estonia :D Everyone knows what you mean the minute you mention it so now you too can be in the know.
I have to mention...again....how excited I get whenever someone mentions the biscuit cheesecake so I am so happy that I get to share this one with all of you :) And here it is :)

As a city dweller I command a fairly small kitchen, meaning the use of an oven usually entails me yanking it out of the cupboard, setting it on my kitchen table and loosing that all-important working space. In addition, baking is a more time-consuming endeavour, which is why after a long day during the week I turn to a simple yet effective recipe: a delicious Estonian biscuit cheesecake (also a great Fathers’ Day present, which we celebrate here today).

The recipe is suitable for bakers of all ages!

All-important ingredients (all depend on the size of the cake you make): 

1.       Sour Cream
2.       Cheese curd (quark)
3.       Cocoa powder
4.       Biscuits
5.       Berries
6.       Juice

1. Decide on the size of the cake you want to make and choose a suitable cake base, preferably with higher edges, as the masterpiece will tower =)

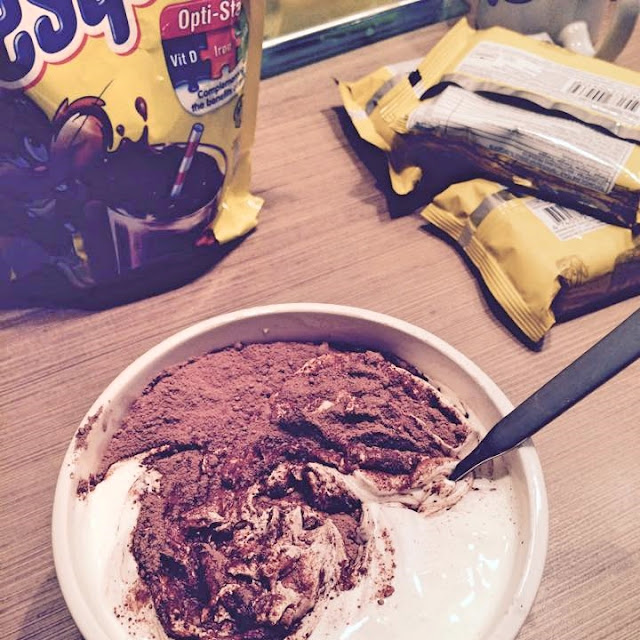
2. Mix the cocoa powder (preferably sweetened) with the sour cream (for the size of the cake I made I used about 750g of sour cream; add the cocoa to taste)
3. Use the mixture to cover the base of your cake base. Be as generous as You want.
4. Mix together the cheese curd + cocoa sour        cream mixture and add berries of your choice – blackcurrants are a personal favourite of mine. (you can use different berries on different layers, like bananas and strawberries ...anything really)
5. Once the mixture is done and the cake base ready you can start building the cake. Before layering the biscuits I like to soak them in some orange juice. This allows the biscuit to more easily absorb all the flavours of the cake and makes the consistency more pleasurable.

6. Cover the biscuits with your mixture of cheese cur, sour cream, cocoa and berries and then add another layer of biscuits – I have chosen to use different flavour of biscuits for varying layers.
Keep going till You’ve reached the desired height.

7. Once You’ve finished, cover the entire cake with the sour cream cocoa mixture You used on the base and cover the cake in its entirety. Design Your own topping and decorate as you please. 

Cover the cake and let is set in the fridge for overnight. However if You’ve used plenty of cream and soaked your biscuits You can dig in after a few hours!

There will be more posts from Kadi during the coming months (hopefully :D) In the meantime you can follow Us and Kadi on Instagram. You can also follow the blog on Bloglovin or you can just keep checking back :)
As always hope you enjoyed the post by the wonderful Kadi 
AND 
Stay tuned
xoxo


Thursday, 5 November 2015

Amazing Homeware On A Budget

If you are one of those people, who loves a good bargain, but hates sales, then keep reading :) I am definitely one of them. I hate sale shopping in the shops (not so much on-line)...so when I find a brand that has affordable prices all year around I get really excited.
As you might have guessed by the title of this post, I am talking about home things here. I just can't get myself to pay 60 pounds for a bedset when I can get one that looks pretty much exactly the same for half the price. And what I have found is that department store own brands are THE BEST at offering awseome  homeware for awesome prices. So here are a few of my favourite pieces I have found over the past month....there are some Christmas related things...I just can't help myself :D
I have two favourites. Asda and Tesco...and I started out this post thinking I will just do one of these, but then I got really into it and I think there is sooooo many gems to share...I will do them in volumes :)

I will start with Asda as I actually live quite close to one now and have managed to get a few things to try out the quality as well.
Here are the few things I have picked out to share with you all.

1.
Bronze ceramic bowl - £3.50
Black Candelabra - £12
Pomegranate and pink pepper reed diffuser - £5
O votive Candle - £2

2.
Mark Making Cushion - £8
Gold dipped hurricane vase - £5
Potpurri Christmas Tree - £5
Merry Christmoose cushion - £7

3.

Mercury Effect Elephant glass lamp  - £20
Metal Terrarium - £10
Chalkboard Globe  - £15
Bark tealight holder - £3 (I have a bigger size that fits a medium pillar candle, and it was £5)

4.

Shine Like The Stars Cushion - £7
Copper Trinket box - £10
Copper Pillar Candle holder - £7
Rose gold Mirror - £5

5.
Bell Jar with Scroll  - £12
Jones Darwin Clock - £15
Glass Topped Marble Effect Box - £12


I don't think I have to mention it anymore of how amazing these things are. And they are so affordable. I haven't linked all of them because they are super easy to search on the asda webpage ..so go browse, I will assure you, that you will find something amazing to turn your house into home

Similar (or exact) products I've found at a great price :)

Hope you enjoyed the post.
Let me know which place is your favourite for home things :)
And as always, Stay tuned :)
xoxo
Meril